Table of Contents
Key Highlights
- Playwright makes it simple to take screenshots for visual regression testing.
- You can quickly capture full page screenshots, parts of a page, or specific areas to fix UI issues.
- Improve your screenshots by adjusting the image quality, format, and resolution for better comparisons.
- Automated workflows and setup tools can help manage tasks across several pages, which speeds up your work.
- Playwright also allows you to mask and edit DOM elements and change the viewport for better screenshot options.
- High-quality screenshots are key for documentation, communication, and debugging in Agile teams.
Introduction
Creating user interfaces that look good on different browsers and devices is very important in today’s web development. The Playwright test framework is popular with teams that focus on automation. Using Playwright’s screenshot method, teams can quickly take pictures of their user interfaces. This helps with visual regression testing and gives clear documentation for any issues. Whether they want to check if layouts look the same, find surprising changes, or spot bugs quickly, Playwright provides easy tools. Developers can also use Playwright debug features to step through tests, capture logs, and inspect issues in real time. This makes visual testing, debugging, and taking screenshots simple and efficient.
Understanding Playwright and Its Screenshot Capabilities
Understanding Playwright and Its Screenshot Capabilities
Playwright is a free tool used for testing web apps. It automates the testing process. With its helpful APIs, you can do many tasks. You can perform web scraping and act like a user in web browsers. This is why many development and QA teams enjoy using it now.
One great thing about Playwright is its ability to take screenshots. You can capture the entire page or focus on a specific element. This feature lets you track changes over time. The screenshot tools in Playwright help you spot bugs easily. They also make automated tests more reliable.
What is Playwright?
Playwright is a strong and free tool used for automating browsers. It is great for web testing and web scraping. It works nicely with Chromium, Firefox, and WebKit. This lets you check how things work on different browsers. Playwright uses new APIs to make it easier to automate browsers and scrape the web. It gives testers and developers everything they need in one spot.
This framework helps you behave like real users. It checks if websites work well. It also allows you to automate tasks you do often in your browser. You can easily navigate websites, fill out forms, and interact with different UI elements. Additionally, you can capture console logs and monitor network activity. This is great for test automation. The strong support for browsers is useful for projects that want a smooth experience across different platforms.
Playwright is more than just a testing tool. It has flexible APIs that are really helpful for web scraping and gathering data. These APIs also simplify workflows. Playwright comes with many features that help developers manage their browsers effectively. It provides the speed and accuracy needed to automate tasks in the browser.
Why Use Playwright for Screenshots?
Playwright is a great tool that lets you take automated screenshots. It has many features and is very adaptable. You can capture full-page screenshots or focus on a specific element. Playwright also helps you spot and fix UI problems fast. This helps ensure that users enjoy a smooth experience on any browser or device.
For visual regression testing, Playwright lets you compare images side by side. This helps teams spot small changes in the user interface (UI). It’s easy to take a screenshot of a specific element or compare different versions. This way, developers can create interfaces without mistakes. The clear “snapshot” function makes it easy to build strong test routines and helps a lot.
You can adjust the API to meet your needs. You can automate tasks such as taking full page screenshots or specific images. These features make it simpler to solve problems. They also help build a steady workflow for regularly checking visuals during development.
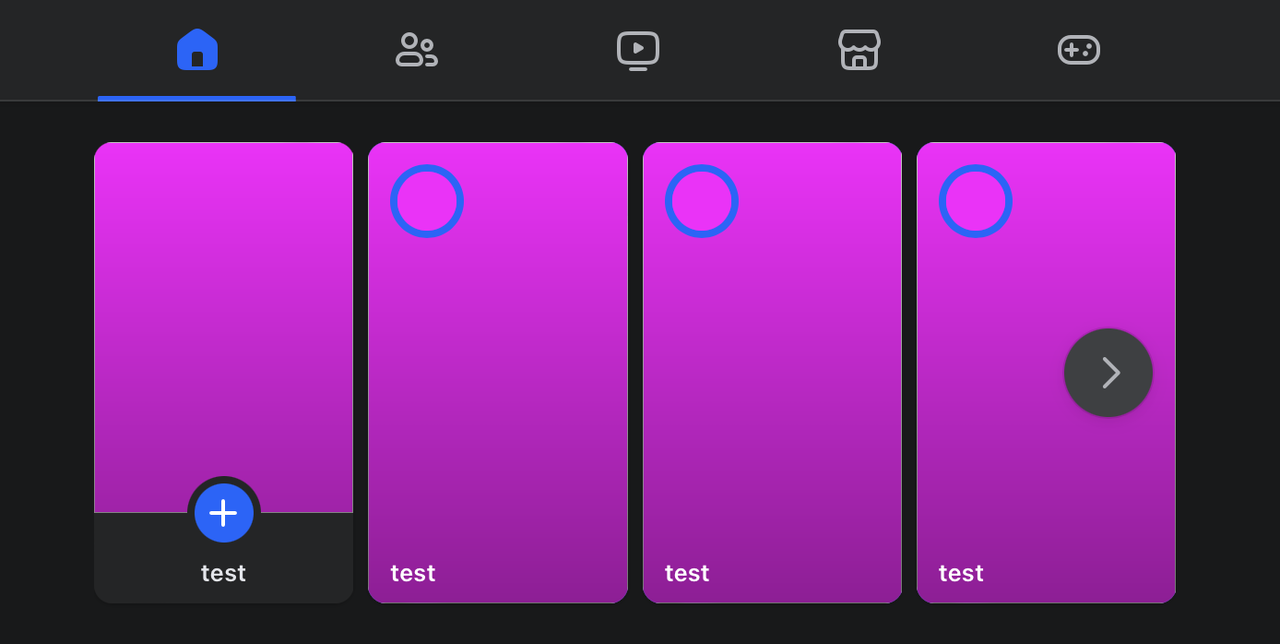
Preparing to Take Screenshots with Playwright
Source: scrapeops.io
To get clear and good screenshots in Playwright, you need to plan ahead. When you set up your tools and environment the right way, your screenshots will show the important parts of your web application easily and without mistakes.
Before you start, collect all the resources you need. Set up a good configuration. Pay attention to important details, like the layout of the repository and what specifications are required. A solid start will lead to better and more efficient screenshot results.
Essential Tools and Resources Needed
First, you need to add Playwright to your project. You can typically do this with npm. Make sure to add any drivers you need, such as playwright-chromium. A clean repository will help you manage your tests better as they grow.
Next, you have to clearly set your configuration. You can use a config file or set it up in your scripts. This helps you manage how the tests run. You can choose browser options and decide where to save your screenshots. A clear configuration can save you time and avoid problems with paths or test files.
Your spec files need to be well-organized. They should show which pages or sections you will test, and explain how to take screenshots. A tidy repository with clear test specs and simple steps for taking screenshots will help your team succeed each time.
Setting Up Your Environment for Playwright
Start by picking the right viewport size for how your users look at things online. Setting the viewport correctly is key. This choice impacts how the screenshot shows the layout and content of your app. You might need different settings for desktop and mobile devices. This is very important when you test responsive design.
Think about using proxies. If you want to reach content blocked by a firewall or get information from restricted areas, adding proxies to your Playwright workflow can help your tests. This will let you mimic real network conditions when you take automated screenshots.
Using Playwright in your daily tasks has many benefits. It allows you to often take screenshots automatically. You can also add visual checks to your CI pipelines. Plus, it helps you create a reliable setup. This makes visual testing simple and easy to repeat. A good setup makes everything easier to understand, reduces false positives, and significantly improves your testing efficiency.
Step-by-Step Guide to Capturing Screenshots
Using the screenshot features of Playwright is easy. It offers many useful options and methods that you can adjust. With a simple step-by-step guide, you can take full-page pictures, capture certain areas, or focus on individual UI elements without any issues.
By knowing each step, such as setting things up, picking the right methods, and adjusting the parameters, you can create clear and useful images. The sections that follow will explain this process. This understanding will help you feel confident when you start taking great Playwright screenshots.
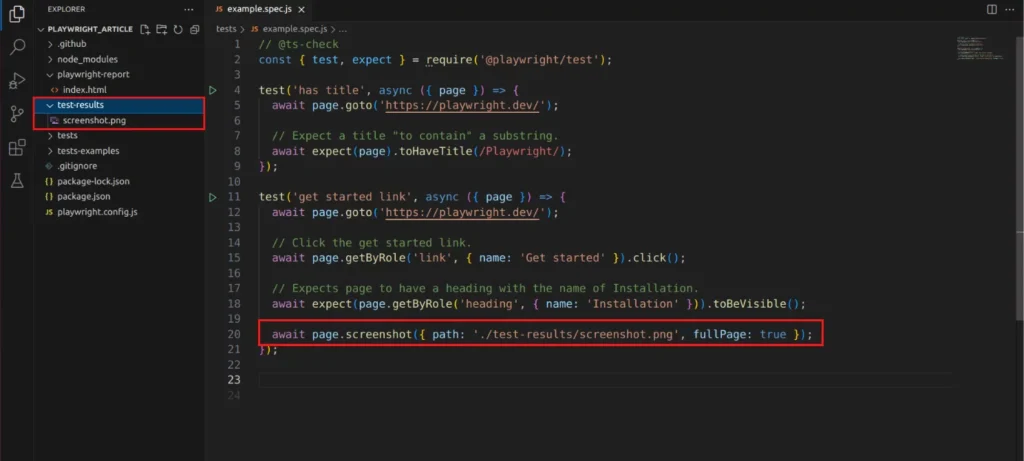
Step 1: Configuring Playwright for Screenshots
Source: testersdock.com
Start by setting up your Playwright test environment. You can run your automation tests by using the
playwright test
command. In each test case, remember to use the screenshot method. This method helps in many situations. It is easy for both new users and experienced testers.
The screenshot method uses an object that has several parameters. This object lets you do things like set the file path, pick the image format, change the quality, define the area to capture, and set a timeout. It also gives you more options for your needs. For example:
await page.screenshot({ path: ‘example.png’, fullPage: true });
You can decide where to save your screenshots by using options such as
fullPage
,
path
, and
type
. You can also choose the format you want to use.
By changing these settings, you can make sure that every screenshot in your Playwright test shows your app’s state clearly. A good configuration is really helpful. It makes it easier to handle tasks without any problems. This way, you can focus on what really matters — quickly spotting visual issues.
Step 2: Capturing a Full Page Screenshot
Capturing a complete image of a long webpage is important for visual regression testing. Playwright makes this easy. You only need to set the fullPage option to true in the screenshot method. This lets you capture the entire page, not just what is visible on your screen. You will get a full snapshot that you can use later to check or compare.
Here are the steps to capture the entire page:
- Open the website you want to check using Playwright.
- Type
- await page.screenshot({ path: ‘fullpage.png’, fullPage: true });
- to take a screenshot of the whole page.
- Save the file or compare it as needed for your tests.
Full page screenshots are very helpful. They are great for web pages that load content in different ways, have long scrolls, or show certain parts only when users click on them. A clear and complete screenshot helps teams quickly find layout changes, broken links, or hidden problems on the page.
Step 3: Taking Screenshots of Specific Elements
Sometimes, you don’t need to capture the entire page. You can focus on a specific element instead. Doing this lets you see visual changes faster and fix any issues more easily. Playwright’s locator API is great for this. It works well with CSS selectors, allowing you to isolate and take snapshots of buttons, forms, banners, or any other custom part of the UI.
Follow these steps:
First, you need to find the CSS selector for the element you want. It could be something like
#login-button
or
.main-banner
. To select the element, use
const element = await page.locator(‘selector’)
. To take a screenshot of the element, use
await element.screenshot({ path: ‘element.png’ });
.
Targeted screenshots are useful for finding issues in UI components that can be reused. They let you take pictures of results from specific test cases or check style and behavior changes on their own. Focusing on these single captures helps developers and QA teams use Playwright to keep an eye on the quality of the UI in every deployment.
Tips to Enhance Screenshot Quality and Resolution
Taking clear and quality screenshots is important for solving problems and writing effective reports. Fortunately, Playwright lets you control the image format, compression settings, and output resolution. This feature helps you customize your screenshots for different purposes.
Choosing how to save your screenshot is very important. Changing the resolution can make it clearer. You will see the difference in your image. This change also keeps your documentation easy to read. When you pay attention to these details, you can lessen confusion. This helps solve problems quicker and improves teamwork with developers and the QA team.
Managing Image Quality Settings
Playwright allows you to change your screenshots easily. You can pick the image format and quality. The default format is png. This format keeps your images sharp, making it easy to see details in your visuals. If you need to make the file size smaller, especially for large documentation, you can choose jpeg and adjust the quality settings.
You can manage the quality of your images easily. When you use the
screenshot
method, choose ‘jpeg’ for the
type
and set the
quality
between 0 and 100. Remember, this quality setting does not change png images. They always maintain the best quality. This is why png images are great for visual comparisons and closely checking the UI.
Choosing the right format and quality is very important. It helps you find a good mix of clarity, speed, and space. PNG is perfect for accuracy, so it is great for checking tests. On the other hand, JPEG can be adjusted for size. This makes it better for daily documentation or reports when file size matters more than getting the best image quality.
Adjusting Resolution for Clarity
The quality of your screenshots depends on the viewport size in Playwright. To get a better resolution, you should increase the width and height of the viewport. You can do this by using the
setViewportSize
method before you take the screenshot. For instance, setting your viewport to 1920×1080 for a desktop view will give you clearer pixel details. Smaller viewports can also help you understand how your pages appear on mobile devices.
Changing the viewport size can improve your screenshots. It helps you see how designs fit on various devices. This change is crucial for teams that want to test responsive design. They can check how the UI looks on both desktop and mobile screens.
To make sure your screenshots are helpful, change your resolution to match your testing goals. Clear and detailed images help prevent confusion. They also help you find bugs faster and support your team in talking about test results more effectively.
Conclusion
In conclusion, getting better at taking screenshots with Playwright can improve your web development workflow. Understanding how it works and having a good plan, from setting up your tools to making better screenshots, can make your job easier. This allows you to create great images to display your work. Playwright gives you detailed screenshot options and lets you adjust things to suit your needs. If you want to learn more about Playwright, you can read our FAQs or ask for more tips and tricks. Happy screenshotting!
Frequently Asked Questions
What is the best format to save screenshots in Playwright?
The best image format for Playwright screenshot is PNG. This format maintains high quality. It is great for checking visuals and running tests. When you save screenshots as PNG in your documentation directory, they stay clear and stable. This makes visual comparisons easy and fast.
How do I automate screenshot captures for multiple pages?
You can set up a system to automatically take screenshots of multiple web pages. First, list the URLs you want to capture. Then, use a loop in your playwright test to visit each URL. Set the screenshot method for every page. Save the files in a specific directory. With this method, test automation becomes easier and you will improve your test coverage with minimal setup.
Can Playwright capture screenshots on mobile viewports?
Playwright lets you take screenshots that look like they are from mobile devices. You just have to change the viewport size and the browser context. If you adjust the viewport and simulate the content type, you can get accurate screenshots. This helps ensure that your web application works well on different devices.
Is it possible to edit screenshots directly in Playwright?
Playwright does not allow you to edit screenshots immediately after you take them. You can change the DOM or delete nodes before you take the screenshot. If you want to make changes to the images, you need to use other tools in your workflow. These tools can help you crop, mask, or alter your screenshot files however you like.
Troubleshooting common issues with Playwright screenshots
To fix problems with Playwright screenshots, you should try increasing the wait times. This can help stop timeout errors. Make sure your proxies are set up right. Check that you are using the screenshot buffer correctly. Look over the selectors and target directories to fix any path or content issues. Doing these things will help you get better and more dependable screenshot automation.