Over 20,000 injuries occur each year due to faulty installations or mishandling heavy garage components.
The risk of getting hurt increases when safety guidelines are ignored. Many homeowners attempt installation without considering the weight, moving parts, or proper alignment.
A poorly installed structure can fall unexpectedly, causing property damage or injury.
Professional installation guarantees safety, but costs more. Tackling the project alone requires patience, the right tools, and a solid step-by-step approach.
A successful job means no mechanical issues and a door that operates smoothly. Read carefully before starting, and never ignore safety warnings.
Table of Contents
Key Points:
- Proper preparation prevents injuries and costly mistakes.
- Tools and materials make a huge difference in efficiency.
- Installation requires patience, precision, and teamwork.
- Step-by-step instructions simplify the process.
- Safety precautions must always come first.
Choosing the Right Garage Door for Your Home and Budget

Source: homecrux.com
Picking the right type depends on multiple factors. Some homeowners focus on style, but durability and function should come first.
An insulated model saves energy by regulating temperature inside the space. Reinforced steel options provide better security than aluminum or wood.
Automatic systems offer convenience, while manual ones cost less and require fewer repairs.
A high-quality system improves curb appeal, but price varies based on material and added features.
A budget-friendly model works fine for basic needs, while premium designs enhance aesthetics and security.
Check available options before making a decision. For a reliable choice, consider garage door replacement Calgary based.
A new installation not only improves appearance but also adds long-term value to a home.
Tools and Materials Needed Before Starting the Installation
Preparation eliminates delays. A missing tool slows down progress, causing unnecessary frustration.
A complete list ensures everything stays within reach when needed. These are some of the basic tools and materials that you might needed.
Basic Tools
✅ Power drill with appropriate bits
✅ Adjustable wrench for tightening bolts
✅ Screwdrivers (both flathead and Phillips)
✅ Level to check proper alignment
✅ Tape measure for accurate dimensions
✅ Clamps for stability
✅ Ladder for overhead adjustments
✅ Sawhorses to support heavy panels
Materials
- New garage door kit with pre-cut sections
- Hinges and rollers for movement
- Tracks and brackets for proper positioning
- Torsion springs for balance
- Cables and drums for guided motion
- Lag screws and bolts for secure fastening
- Weatherstripping for sealing gaps
Before handling parts, confirm that all materials match the manufacturer’s instructions. Missing or incorrect components cause alignment issues and instability.
Preparing Your Garage Space for a Smooth Installation
Source: abettergaragedoorinc.com
Clearing the area eliminates potential hazards. Objects blocking the workspace make maneuvering heavy panels more difficult.
Before unboxing materials, take a few minutes to organize the environment properly.
- Remove any storage items, tools, or vehicles.
- Ensure the floor remains free of debris and obstacles.
- Set up worktables or sawhorses for easy access to materials.
- Secure pets and children away from the workspace.
- Check existing framework for damage before proceeding.
The smoother the setup, the easier each installation step becomes. Proper preparation prevents unnecessary movement and frustration.
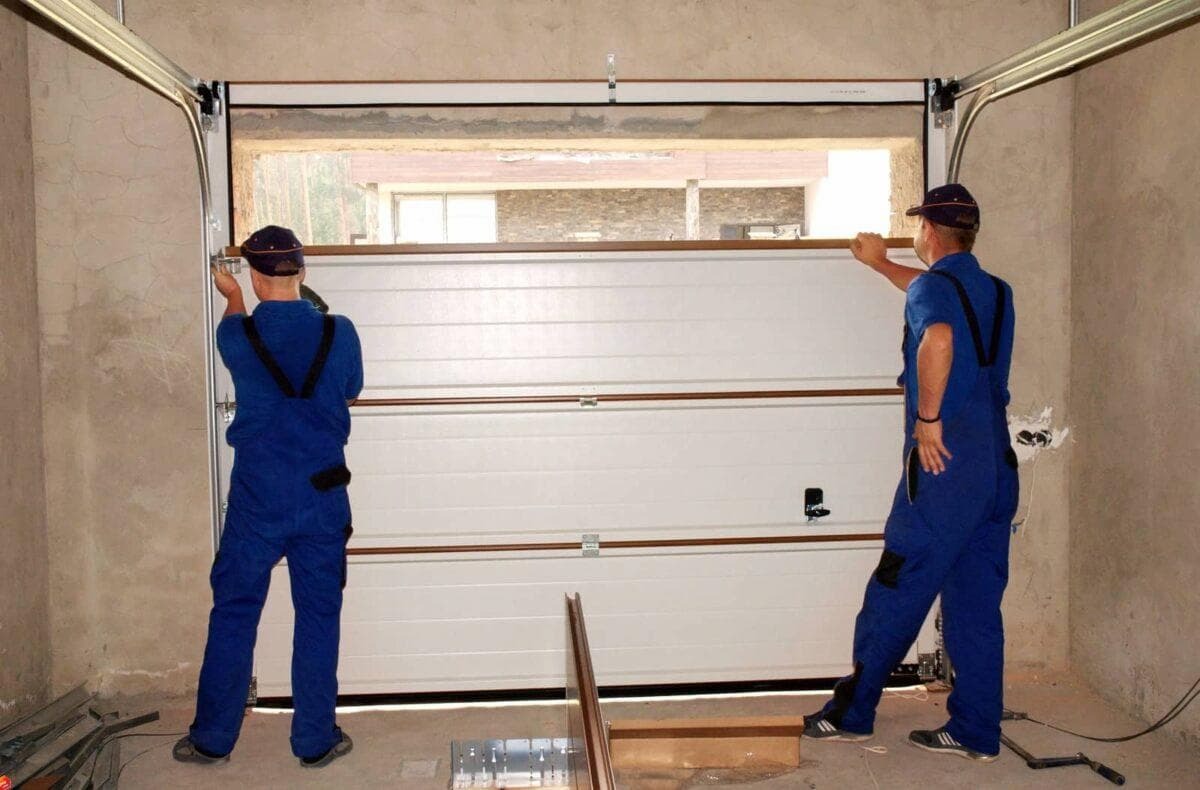
Assembling the Sections Before Attaching Them to the Frame
Garage doors typically arrive in multiple sections. Putting them together before lifting into place improves accuracy. Panel misalignment leads to movement issues later. Each piece must fit tightly to ensure stability.
- Lay the first section flat on a sturdy surface.
- Attach hinges at designated points, securing with provided screws.
- Install handles or locking mechanisms for access.
- Stack the next section on top and secure with additional hinges.
- Repeat for each section until all panels connect securely.
Hinges must sit flush against the surface, allowing proper movement. Misaligned sections create gaps that weaken the overall structure.
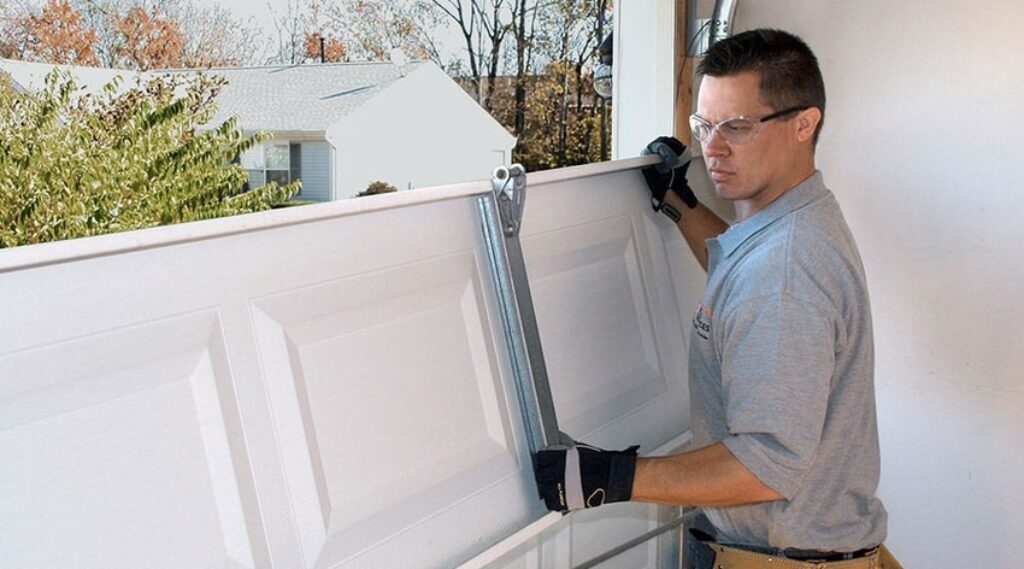
Installing the Tracks and Securing the Frame
Tracks guide movement, ensuring smooth operation. Poor alignment leads to jerky motion, excessive noise, or failure to close properly. Checking each measurement avoids future complications.
Steps to Follow:
- Position vertical tracks on each side of the opening.
- Fasten securely with lag screws, verifying level alignment.
- Attach horizontal tracks at the top, ensuring parallel placement.
- Confirm that all track connections remain firm before proceeding.
- Double-check for potential obstructions before the next step.
A well-secured frame allows effortless operation. Even a slight misalignment causes dragging or resistance when opening and closing.
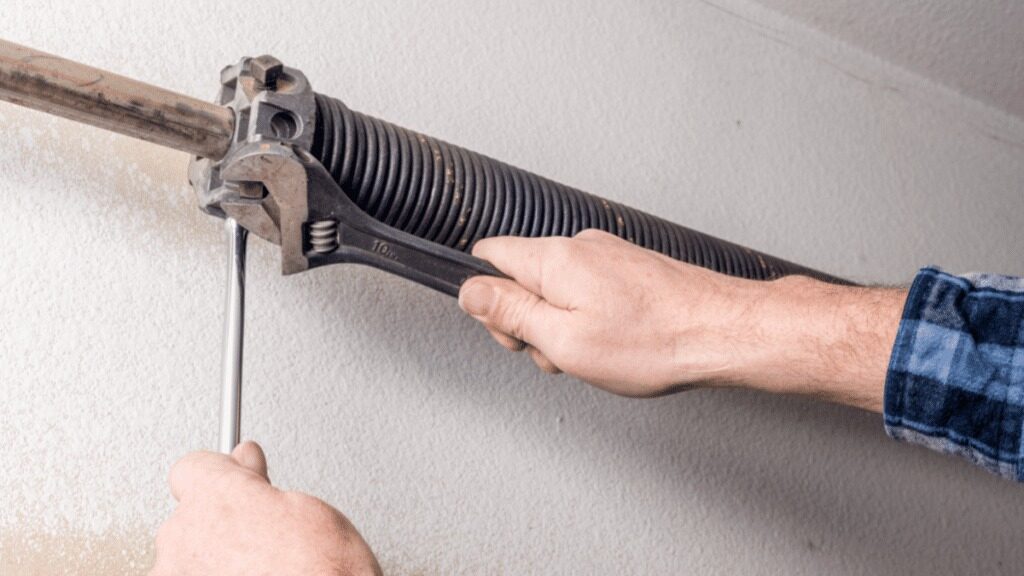
Handling Torsion Springs Without Losing a Finger
Source: 247superiorgaragedoor.com
Torsion springs store immense tension. Mishandling them results in serious injury. Many professionals advise against adjusting them without proper knowledge. Those who choose to proceed must exercise extreme caution.
Winding bars should always be used instead of makeshift tools. Gloves and eye protection prevent unnecessary accidents. Springs must be adjusted gradually, checking balance frequently. If the tension is too high, the door may snap upward violently. If it’s too loose, it won’t hold in place.
Any uncertainty about handling springs safely is reason enough to call a professional.
Attaching the Cables and Testing the Balance
Cables keep everything aligned during movement. If improperly attached, uneven weight distribution occurs. Testing balance ensures long-term function without unnecessary strain.
- Connect cables to the bottom bracket, securing tightly.
- Run each cable over the drums connected to the torsion bar.
- Adjust tension until both sides maintain equal resistance.
- Manually raise and lower the door halfway.
- If it stays put, balance remains correct. If it shifts, adjust tension.
Balance adjustments prevent premature wear and potential failure.
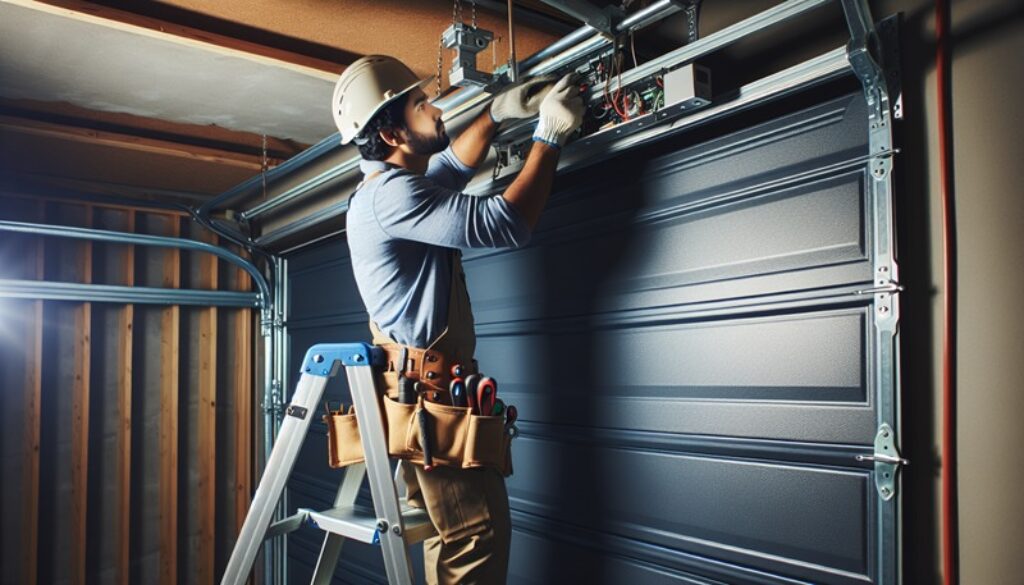
Installing the Opener for Automated Functionality
Source: blog.acmetools.com
An automatic opener adds convenience. Modern units integrate with smart home systems for remote operation. Installation follows a specific sequence to ensure proper function.
Steps for Installing the Opener:
✅ Secure the motor unit to the ceiling using mounting brackets.
✅ Attach the rail system along the top frame.
✅ Connect the trolley to the garage door for smooth motion.
✅ Adjust the chain or belt drive for optimal tension.
✅ Plug the unit into a power source and conduct a test run.
✅ A fully functional opener guarantees ease of access without manual lifting.
Common Mistakes to Avoid for a Trouble-Free Experience
A few missteps create major headaches. Rushing leads to errors that require costly corrections later. Avoid common issues by following proper steps.
Skipping balance tests, over-tightening screws, and failing to check alignment lead to long-term problems. The best approach involves patience and careful execution. If something feels off, stopping and reassessing the situation prevents damage.
Wrapping It Up: A Job Well Done
A properly installed garage door offers convenience, security, and improved curb appeal. Taking shortcuts leads to costly repairs and potential safety hazards.
Following each step methodically guarantees a professional-grade outcome. If any part seems too complex, hiring a professional remains the safest option.
Confidence, preparation, and attention to detail result in a smooth installation process. Enjoy the satisfaction of completing a project that enhances both function and appearance.